School ERP Implementation Guide: Step-by-Step Process
This blog offers a practical guide to choosing and implementing a school ERP (illustrated with VidhyaNova). It argues that replacing paper and disconnected apps with a single system centralizes records, automates fees, improves attendance and communication, and enables data-driven decisions. It presents a ten-step roadmap set objectives, assess systems, gather requirements, select a vendor, plan migration, configure, pilot or phase rollout, train users, test thoroughly, and monitor post-launch while stressing stakeholder buy-in, data cleanup, limited customization, security, integrations, realistic budgeting, KPIs, and continuous support. The purpose is to help school leaders adopt ERP thoughtfully to reduce admin burden and increase adoption and efficiency.
Most schools wrestle with these choices. A new ERP like VidhyaNova can feel overwhelming at first glance. Small academies and large public systems alike ask what will truly work for their day-to-day operations. Choosing the right solution means aligning VidhyaNova’s capabilities with real routines, not just promises. Migrating old records often becomes a hurdle, especially when years of spreadsheets are involved. Concerns about glitches make teams cautious. Staff adoption doesn’t happen overnight—trust in VidhyaNova builds gradually with experience. Parents also need clear, simple communication, not jargon-heavy updates. The path forward with VidhyaNova begins by listening closely before planning the next steps.
At first, many school leaders and IT staff felt swamped - later, that stress faded when they saw a clear path forward. Flashy tools matter little; what counts are workflow, teamwork, and decisions that make sense on the ground. You’ll find step-by-step actions here, along with typical missteps and honest time frames - all aimed at launching your school’s automated systems without shaking things up too much.
Why Schools Need an ERP Now
Let's be blunt. Paper-based systems and disconnected apps create workarounds that waste time and hide problems. A school ERP brings core operations into one place. That matters for daily efficiency and long-term planning.
- Centralized student records so you don't hunt for transcripts every semester
- Automated fee collection and finance tracking to close gaps in revenue
- Attendance and timetable management that actually match reality
- Parent and teacher portals that improve communication and reduce calls
- Data that helps you make decisions, not guesses
Most days someone brings up school tech upgrades. My reply always lands like this: think slow shifts, not sudden flips. One tool that makes sense? An ERP built for education centers. It handles routine work while showing results over time. It turns administrative chaos into reliable routines. To dive deeper into the process, read our complete school ERP implementation guide and see how schools are successfully making the transition.
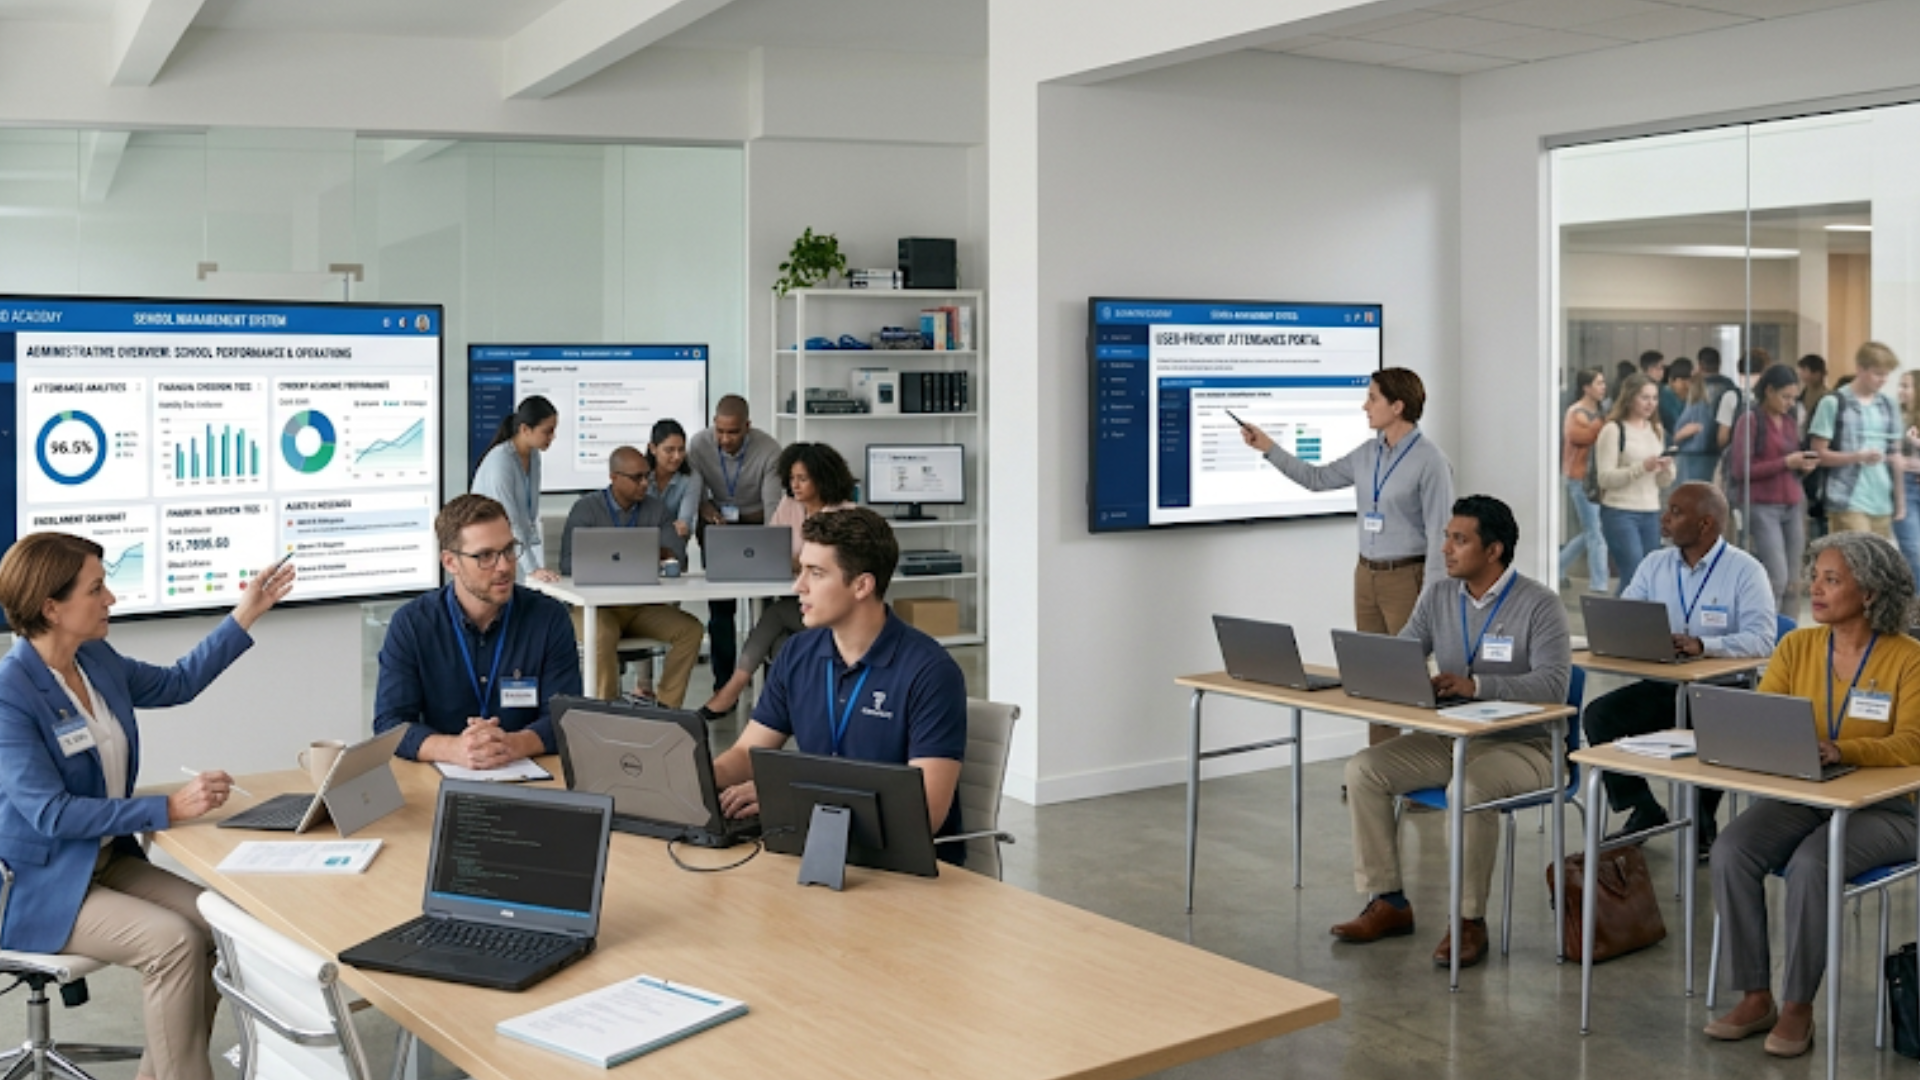
Benefits You Can Expect from a School Management Software

Benefits get thrown around a lot. But here's what you should expect in practical terms.
- Time savings for admins and teachers. Simple automation frees hours every week.
- Better cash flow. Automated invoicing and online payments reduce late fees and follow-up work.
- Stronger parent engagement through timely notifications and mobile access.
- Improved compliance and record keeping for audits.
- Data-driven insights for student performance, attendance trends, and resource planning.
These are not vague promises. In schools I have worked with, attendance reporting went from days to minutes. Finance teams stopped manually reconciling ledgers and used that time to analyze trends. Those changes add up fast.
High-Level ERP Implementation Steps
Here is the simple roadmap I follow. Each step has practical tips and common mistakes to avoid.
- Define objectives and get buy-in
- Assess your current systems and processes
- Gather requirements across departments
- Choose the right vendor and product
- Plan data migration and integrations
- Set up pilot or phased rollout
- Train users and manage change
- Test thoroughly and fix issues
- Go live and monitor closely
- Measure success and iterate
Step 1 - Define Objectives and Get Buy-In
Before you look at demos, ask a simple question: what problem are we trying to solve? Schools often say they want "automation." That is not specific enough.
Write 3 to 5 clear goals. Examples:
- Reduce time spent on attendance reporting by 75 percent
- Collect 90 percent of fees online within 30 days of billing
- Provide parents with a mobile app for homework and updates
Next, get stakeholders on board. That includes the principal, finance manager, head of academics, IT coordinator, and a few teachers. If parents and students will use the system, include their representatives too. In my experience, early buy-in prevents a lot of resistance later.
Common pitfall: only the IT team drives the project. That leads to a system focused on technical features but not how teachers or finance staff actually work. Make it cross-functional from day one.
Step 2 - Assess Current Systems and Processes
Take a practical inventory. What systems are you using now? Which processes are manual? Where are the bottlenecks? I like to map three workflows as a start: admissions, fee collection, and attendance to grade reporting.
Collect examples. For instance, get a copy of last term's fee ledger and show how payments were handled. Walk through a typical admission from enquiry to enrollment. These real artifacts make requirements clearer.
Tip: use process maps or simple flowcharts. You do not need expensive tools. A whiteboard photo or a few slides work fine.
Step 3 - Gather Requirements Across Departments
This is where most projects sink or swim. Talk to real users. Ask teachers, not just department heads. Ask parents about notifications. Ask transport staff how bus routes are managed. You want needs, not wish lists.
Use focused questions:
- What tasks do you repeat every day?
- Phone screen showing what info matters most to you?
- What reports must show up during an audit?
- Think about which tools you already use. How should they connect?
- What pieces must work together?
- Which systems share data now?
Start by sorting needs into what's essential, what matters but can wait, then what’s just extra. Chances are, some of those extras will slide off the list - keeps costs and schedules from stretching too far.
Step 4 - Choose the Right Vendor and Product
Picking the right education ERP software is part art and part homework. Vendors sell features. You should buy a partnership. Look for vendors who understand school operations, not just software.
Checklist for vendor selection:
- Reference to experience in education with similar schools
- Modules you might require admissions, fees, attendance, exams, HR
- Cloud-based options to reduce IT burden
- Data Protection(as well as for GDPR or local compliance)
- APIs for integration with your LMS, accounting or biometric systems
- Clear pricing and licensing model
- Training and support services
Don't be dazzled by flashy demos. Ask for a sandbox trial with your data scenarios. I once saw a demo that looked perfect until the vendor tried to import a school's grading scale and failed. That red flag saved the school a lot of trouble.
Step 5 - Plan Data Migration and Integration
Data migration is where the project becomes real and a little terrifying. Years of student records, fee histories, and staff details live in spreadsheets and paper files. You need a plan to move them without breaking trust or compliance.
Start with a data audit. Identify sources, data quality issues, duplicates, and required fields for the new system. Clean data gradually. Don't try to migrate everything at once.
Typical migration steps:
- Export data from current systems or spreadsheets
- Map old fields to new fields using a template
- Clean and deduplicate records
- Import a small batch to test mapping
- Validate with users and correct errors
- Import full dataset and freeze old systems to prevent divergence
On integrations: many schools need the ERP to talk to a learning management system, accounting software, biometric attendance device, or payment gateway. Use APIs where possible. If a vendor offers prebuilt connectors for common tools, that's a big plus.
Common mistake: assuming data is clean. It rarely is. Budget time for cleaning and validation.
Step 6 - Configure, Customize, and Keep It Simple
Most ERPs allow configuration and some level of customization. Here's the rule I use: configure as much as you can. Customize only when absolutely necessary.
Why? Custom code creates long-term maintenance and upgrade pain. You want a system that will accept updates from the vendor without breaking your bespoke changes.
Focus configurations on:
- Academic calendars, classes, sections, and grading scales
- Fee structures and payment rules
- User roles and access controls
- Notification templates and parent communication preferences
If you need custom reports, start with built-in reporting tools. Most vendors provide flexible report builders that cover 90 percent of use cases. Build custom scripts only for rare, mission-critical needs.
Step 7 - Pilot or Phased Rollout
A phased rollout reduces risk. Choose a pilot group that represents daily reality. That could be one grade, one campus, or a cluster of departments. Keep the pilot small enough to manage, but large enough to expose real issues.
During the pilot, collect feedback daily. Fix small problems quickly. Keep documenting issues and resolutions. That documentation becomes your onboarding material for the wider rollout.
Tip: run the old system in parallel for a defined period. Parallel runs help validate processes without risking data loss. But set an end date. Parallel forever equals stalled projects.
Step 8 - Training and Change Management
Software won't fix user habits. Training is where many projects fail. Good training isn't just one workshop. It's a sequence of learning events with practical examples.
Design role-based training:
- Quick start guides for teachers focused on attendance, grading, and communication
- Finance training for fee management and reconciliation
- Admin training for enrollment and records
- IT training for integrations and backups
Use short videos, cheat sheets, and live Q and A sessions. I've noticed that teachers prefer short, bite-sized tutorials they can replay between classes. Schedule follow-up sessions two weeks after go-live to handle the second-order questions.
Change management also means setting expectations. Tell staff what will change and why. Share early wins during the project. That creates momentum.
Step 9 - Test Thoroughly
Testing should be planned and structured. Don't wait for the last week before go-live to find bugs. Create test cases that mimic real life.
- Data integrity after migration
- Fee billing cycles and payment posting
- Attendance capture from devices and manual entry
- Grade calculations and transcript exports
- Reports and regulatory outputs
- Permission checks for different user roles
Include end users in testing. Teachers and finance staff often spot edge cases developers miss. Treat their feedback seriously.
Step 10 - Go Live and Monitor Closely
Go-live day is exciting and a little chaotic. You should plan it like you plan exams. Make sure support is available in real time. I recommend a war room approach on the first two days where IT, vendor support, and key users are on call.
During go-live:
- Monitor error logs and key transactions hourly
- Keep a public status channel for staff and parents
- Capture user issues and assign owners
- Track top 10 pain points and iterate daily
Don't expect perfection on day one. Expect rapid improvement over the first two weeks if you respond quickly to issues.
Post-Implementation: Support, Maintenance, and Continuous Improvement
Implementation does not end at go-live. In fact, it starts a new operational phase. Your goals are stability, adoption, and value realization.
Set up ongoing processes:
- Support desk with ticket tracking
- Regular training refreshers and onboarding for new staff
- Monthly review meetings with the vendor
- Continuous data backups and security audits
- Quarterly KPI reviews tied to your initial objectives
Measure adoption metrics like daily active users for teachers and parents, percentage of online fee collections, and average time to complete key tasks. Those numbers tell you whether the ERP is delivering promised school ERP benefits.
Key Performance Indicators to Track
What gets measured gets managed. Here are practical KPIs that matter to school leaders.
- Attendance capture time per class
- Percentage of fees collected online within billing cycle
- Average time to generate report cards
- Number of open support tickets and resolution time
- User adoption rates by role
- Reduction in manual processes
Track these monthly for the first year. They help you justify the investment and identify areas to improve.
Common Mistakes and How to Avoid Them
Every school I have worked with made at least one of these mistakes. Learning from them shortens your path.
- Starting without clear objectives. Fix: write 3 to 5 outcome-based goals.
- Skipping stakeholder interviews. Fix: interview users before you shortlist vendors.
- Underestimating data cleanup. Fix: budget time and staff for a data audit.
- Customizing too much. Fix: prefer configuration over custom code.
- Poor training. Fix: schedule ongoing, role-based training with follow-ups.
- No post-launch support. Fix: define support SLAs and escalation paths.
One school I advised tried to migrate every single historical record. That created months of work and delayed the launch. We switched to a pragmatic approach: critical records first, archives later. Problem solved.
Simple Example: Rolling Out an ERP for a 500-Student School
Let's make this practical. Here is a condensed example timeline for a 500-student K to 12 school with one campus.
- Weeks 1 to 2 - Define objectives and form steering committee
- Weeks 3 to 4 - Map current processes and gather requirements
- Weeks 5 to 8 - Vendor selection and contract
- Weeks 9 to 12 - Data audit and migration of core records
- Weeks 13 to 16 - Configuration and piloting with two grades
- Weeks 17 to 18 - Training and parallel run
- Week 19 - Go live for entire school
- Weeks 20 to 24 - Monitor, optimize, and measure KPIs
Yes, it takes time. But this phased approach keeps risk low and ensures adoption. A rushed rollout is the fastest way to create chaos and unhappy staff.
Budget Considerations
One thing schools must plan for? The full price tag of an ERP setup - software, getting it running, linking tools, staff learning how to use it, then keeping help active over time. When hosted online, those ERPs often demand less cash at the start, yet charge monthly or yearly fees forever after. Picture tallying every expense you’ll meet between now and five years out; that long view shapes smarter choices.
Typical cost items:
- License or subscription fees
- Implementation and data migration fees
- Integration connectors or custom APIs
- Training and change management
- Hardware upgrades if needed
- Ongoing support and maintenance
In my experience, schools that budget 15 to 25 percent of the initial project cost for first-year change management see better outcomes than those who skimp on training and support.
Security, Privacy, and Compliance
Student data is sensitive. Make security a priority. Ask vendors about:
- Data encryption at rest and in transit
- Role-based access controls and audit logs
- Compliance with local privacy regulations and data residency
- Regular security assessments and vulnerability scans
Start by questioning if the provider truly manages every part. Look into written proof, request their security guide too. Tiny points carry weight here. Take backup frequency - how many times is information copied, plus what location stores those copies?
Integration Tips and Real-World Connectors
Practical integrations that schools often want:
- Payment gateways for online fee collection
- Learning management systems for assignments and grades
- Accounting software for finance reconciliation
- Biometric or RFID devices for attendance capture
- Single sign-on with your identity provider
When possible, pick a vendor with prebuilt connectors for these systems. If not available, use APIs and agree on data formats early. Define who owns the data and how often it syncs. Real-time sync is not always necessary. Sometimes nightly batch updates are more stable and easier to support.
Vendor Relationship: Treat It as a Partnership
Choose a vendor who provides more than software. Look for one willing to partner on adoption, not just implementation. Ask about their implementation methodology and whether they assign a dedicated project manager.
What to ask during negotiations:
- Who will lead the implementation from the vendor side?
- What does support look like after go-live?
- How are software upgrades handled?
- Can we access a sandbox for testing?
- What training resources are included?
A vendor that listens and shows examples from similar schools is often a better long-term fit than one that promises every feature but has no sector references.
Measuring Success and Iterating
After the ERP is live and stable, plan for continuous improvement. Use KPIs and user feedback to prioritize enhancements. Small, regular updates are more effective than rare, big changes.
Schedule quarterly reviews to discuss adoption, open tickets, requested features, and training needs. Invite the vendor to those meetings. Track how the ERP impacts the objectives you defined at the start.
Quick Checklist Before You Start
- Clear objectives and stakeholder buy-in
- Inventory of current systems and pain points
- Prioritized requirements list
- Budget and timeline agreed
- Vendor shortlisted and evaluated
- Data audit plan and migration timeline
- Training and change management plan
- Testing and pilot schedule
- Support and maintenance agreements
- KPIs and measurement plan
FAQs
1. How long does school ERP implementation take?
The timeline for school ERP implementation typically ranges from 3 to 6 months, depending on the size of the institution, data complexity, and customization needs. A phased rollout approach helps reduce risks and ensures smoother adoption.
2. What are the key challenges in implementing a school ERP system?
Common challenges include data migration issues, resistance from staff, lack of clear objectives, and insufficient training. These can be managed with proper planning, stakeholder involvement, and continuous support.
3. How does VidhyaNova help in school ERP implementation?
VidhyaNova simplifies the implementation process by offering user-friendly modules, data migration support, seamless integrations, and dedicated training. It helps schools transition from manual processes to automated systems with minimal disruption.
4. What features should I look for in a school ERP system?
A good school ERP system should include modules for admissions, fee management, attendance tracking, academic reporting, communication portals, and integration capabilities with other tools like LMS and payment gateways.
Final Thoughts
Implementing ERP for schools is a journey. It takes planning, patience, and cross-functional effort. But when done right, it reduces administrative overhead and gives educators more time to focus on teaching. It also gives leaders the data they need to make smarter decisions.
Start with small, measurable goals. In my experience, that approach builds trust and momentum. And remember: technology is a tool. The real change comes from people learning to use it well.
"Start small, learn fast, and keep people involved. That is the simplest formula for a successful school ERP implementation."
Helpful Links & Next Steps
- Vidyanova - School ERP Solutions
- Vidyanova Blog - More Resources
- Book your free demo today
- Contact Us
- support@vidyanova.com
If you'd like a tailored walkthrough or a demo that focuses on your needs, book your free demo today. We've helped schools move from manual processes to systems that actually make life easier for admins, teachers, and parents.